 |
 |
TOAD Towing Cable That Keeps Your Vehicle Charged
|
A frequent question RVers ask is why is the battery dead in my TOAD after being towed? The answer is power is being used by the aux braking system, each time it applies the brakes. The RoadMaster Even Brake system I use has an onboard air compressor that cycles after brakes are applied. After a few hours of operating the brake pedal, I get a warning on the status monitor in the RV that there's a low voltage condition in my TOAD. After another 30 minutes or so, I get a subsequent message saying voltage too low, and the aux braking system is no longer operational. This has become a a major safety item at this point. The fix is incredibly simple, with only minimal parts and effort. The 7 pin, to 6 pin cable you buy or build, already has a 12V charging wire from the motorhome. You need only connect a single wire, and a fuse to the TOADs battery, and you're done. It's a shame the TOAD wiring kits don't mention this feature. Another issue I noted was how much tension was on the coiled cable between the TOAD and the RV. I decided to make my own longer cable, which is also simple to do. |
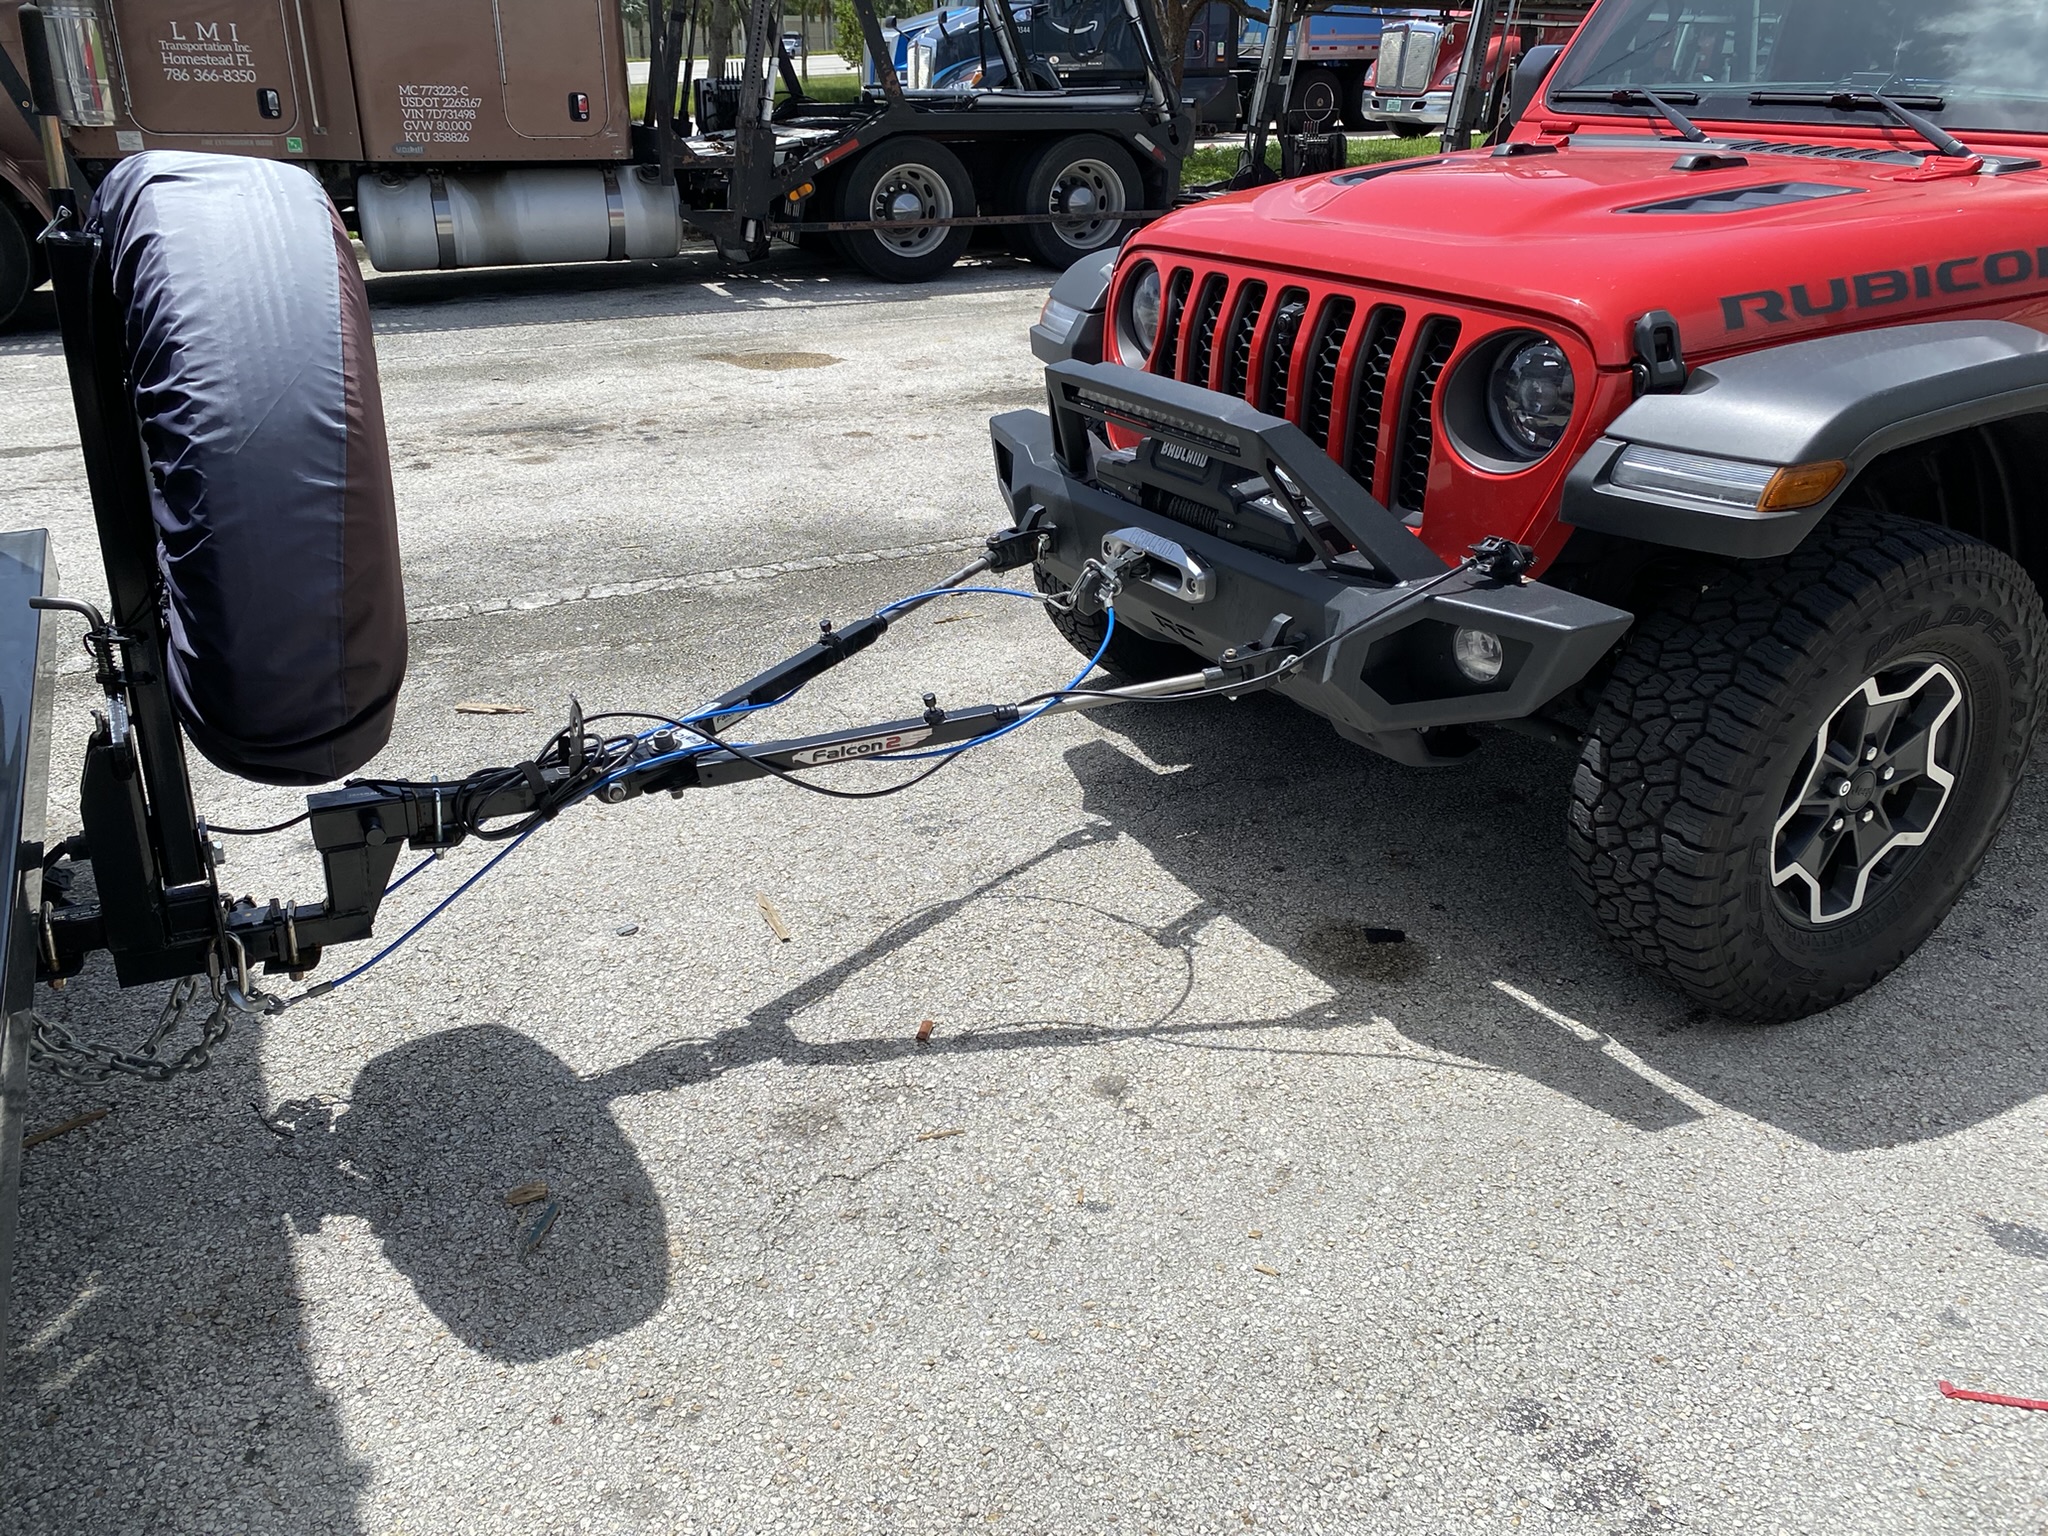
 This is a very well made cable, with an 8' stretch. Technically, it does the job, but it pulls hard on both connectors. |
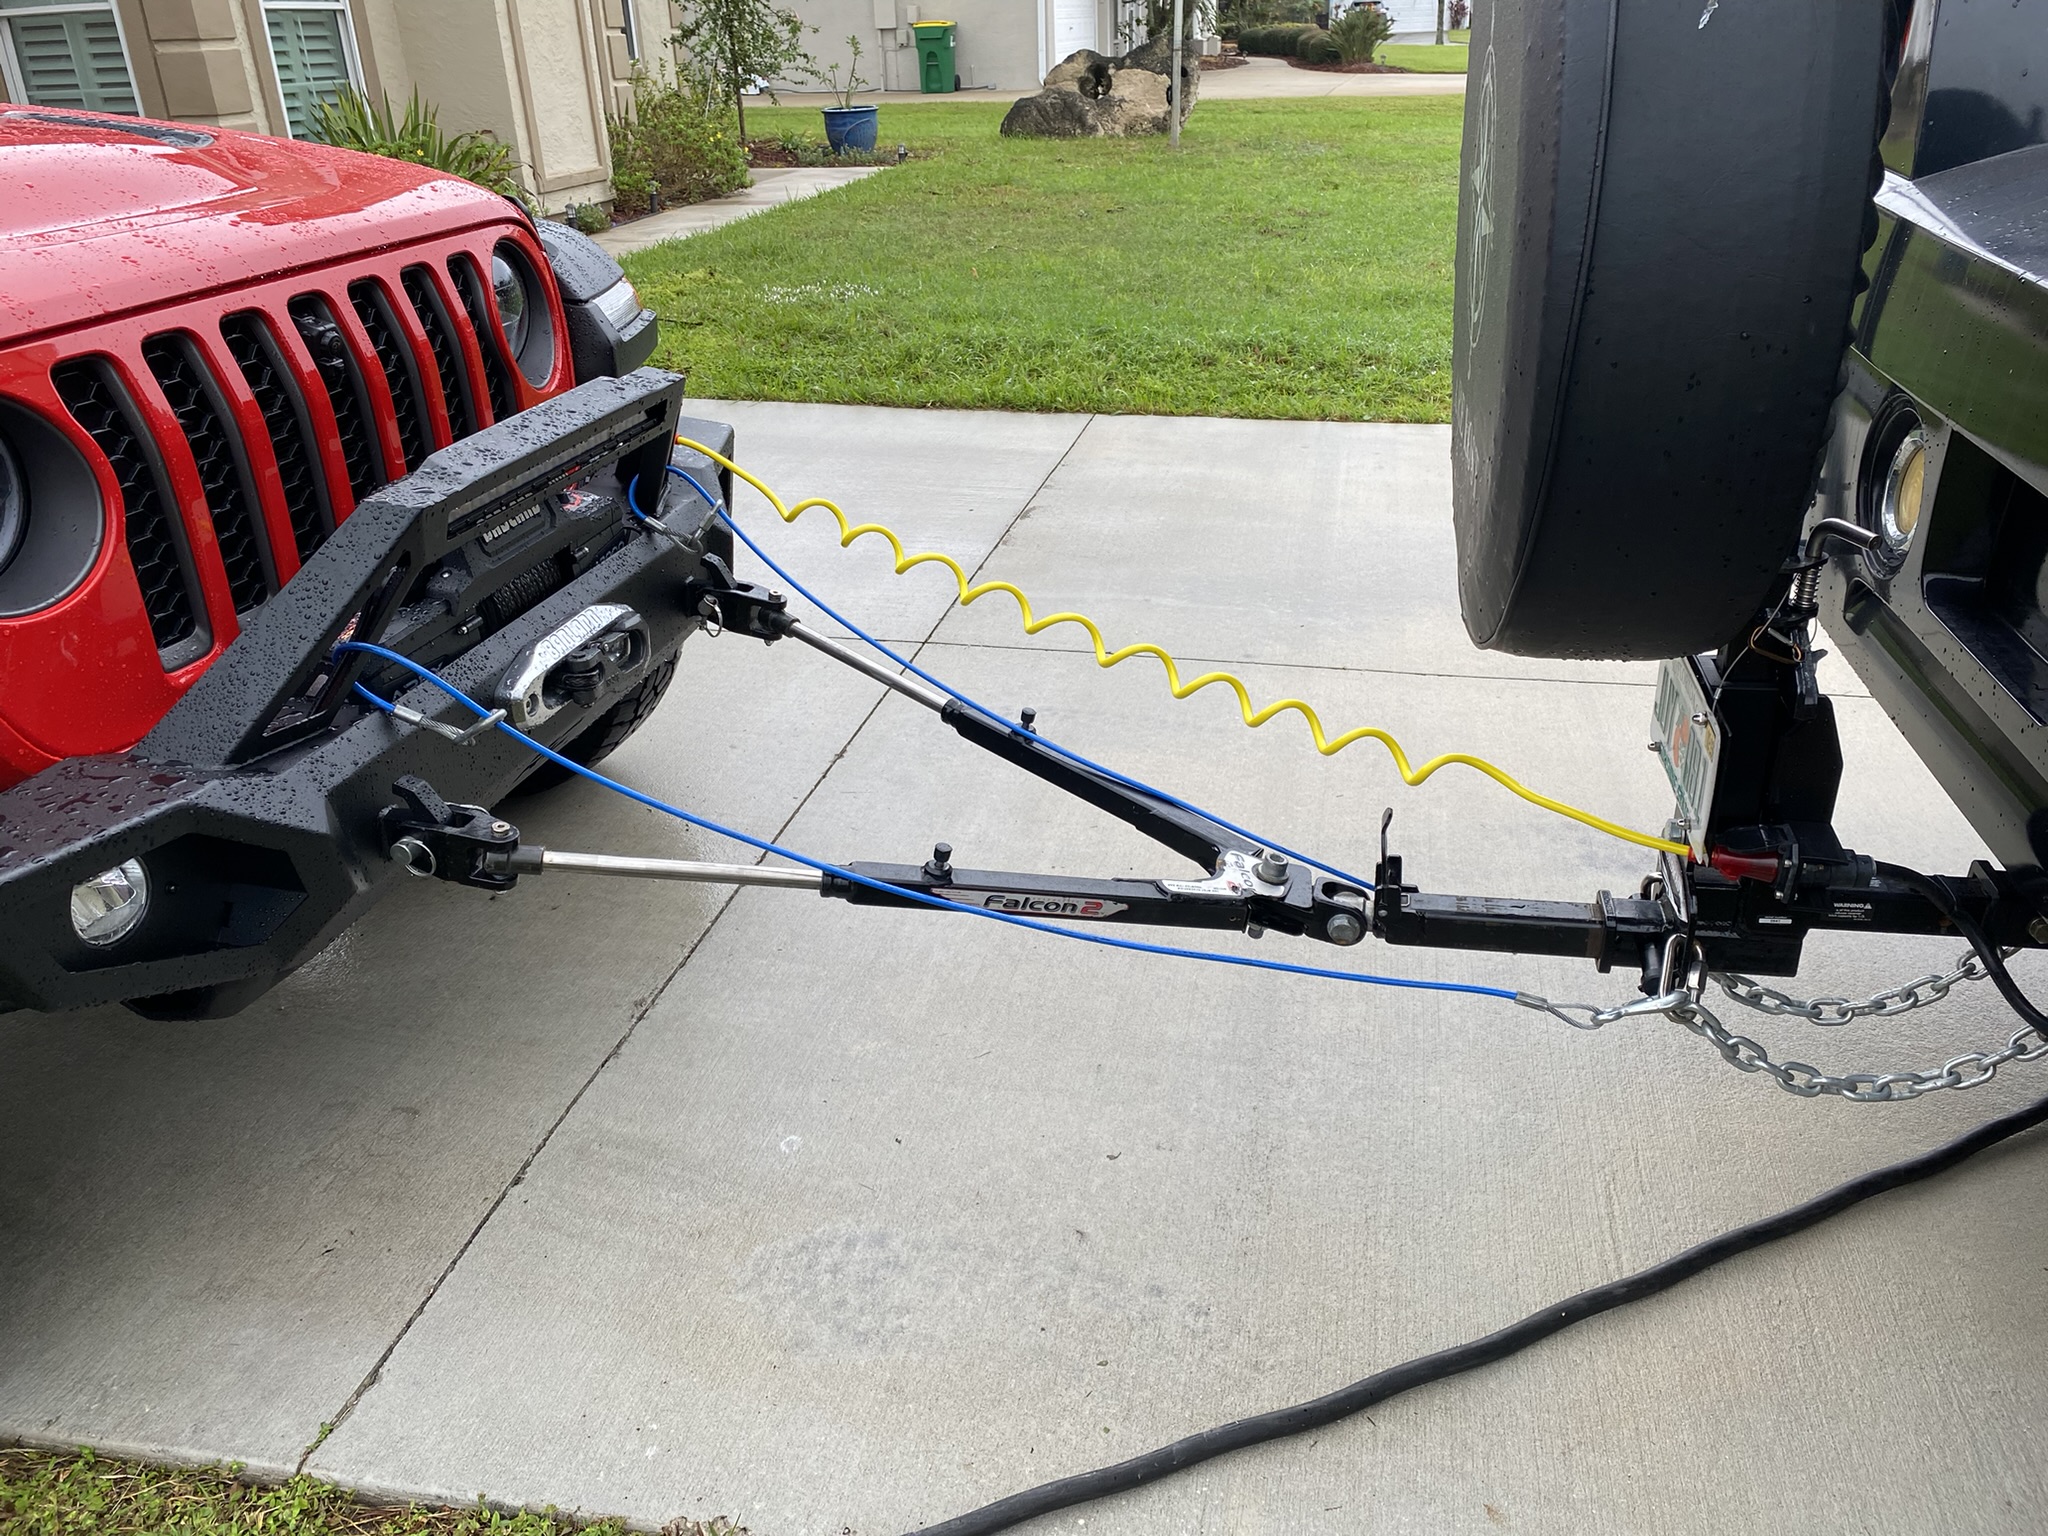 You can see how much tension is on the yellow cord. |
 Really pulls the connection sideways. It works, but for how long? |
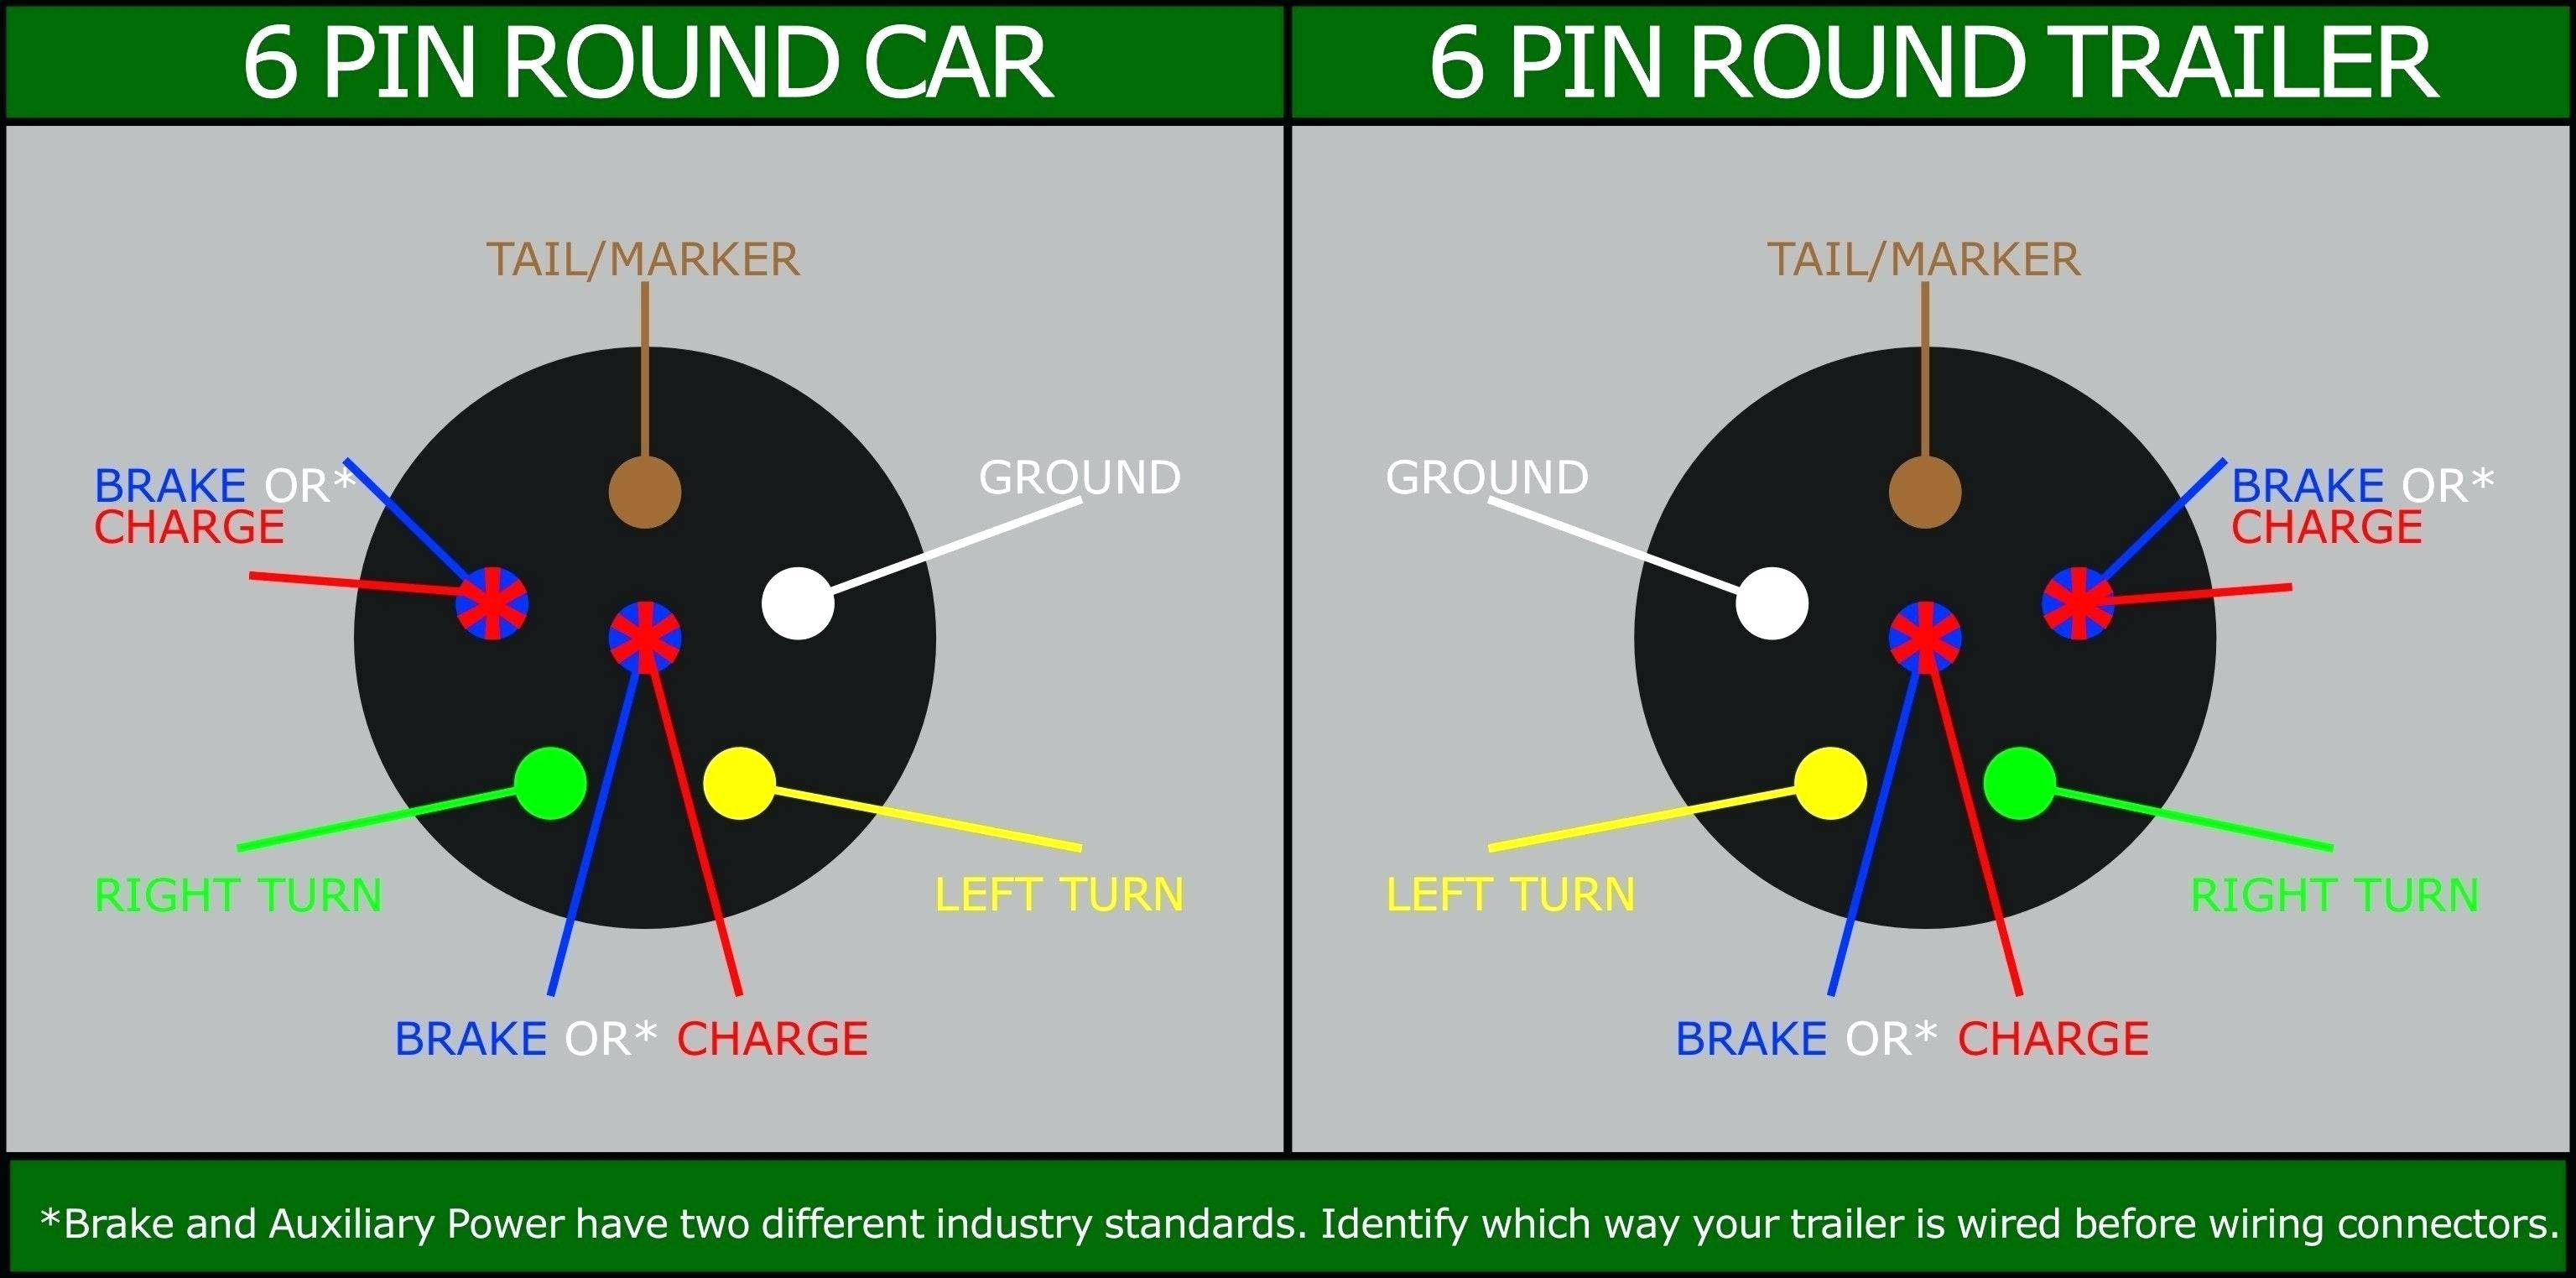 The wiring diagram for the 6 pin connector is easy, but there are a couple of different standards. The electric brake, and the aux 12V+ connection can be wired like what is shown, or these two can be reversed. Check with a meter to verify your wiring, or your TOAD won't charge. |
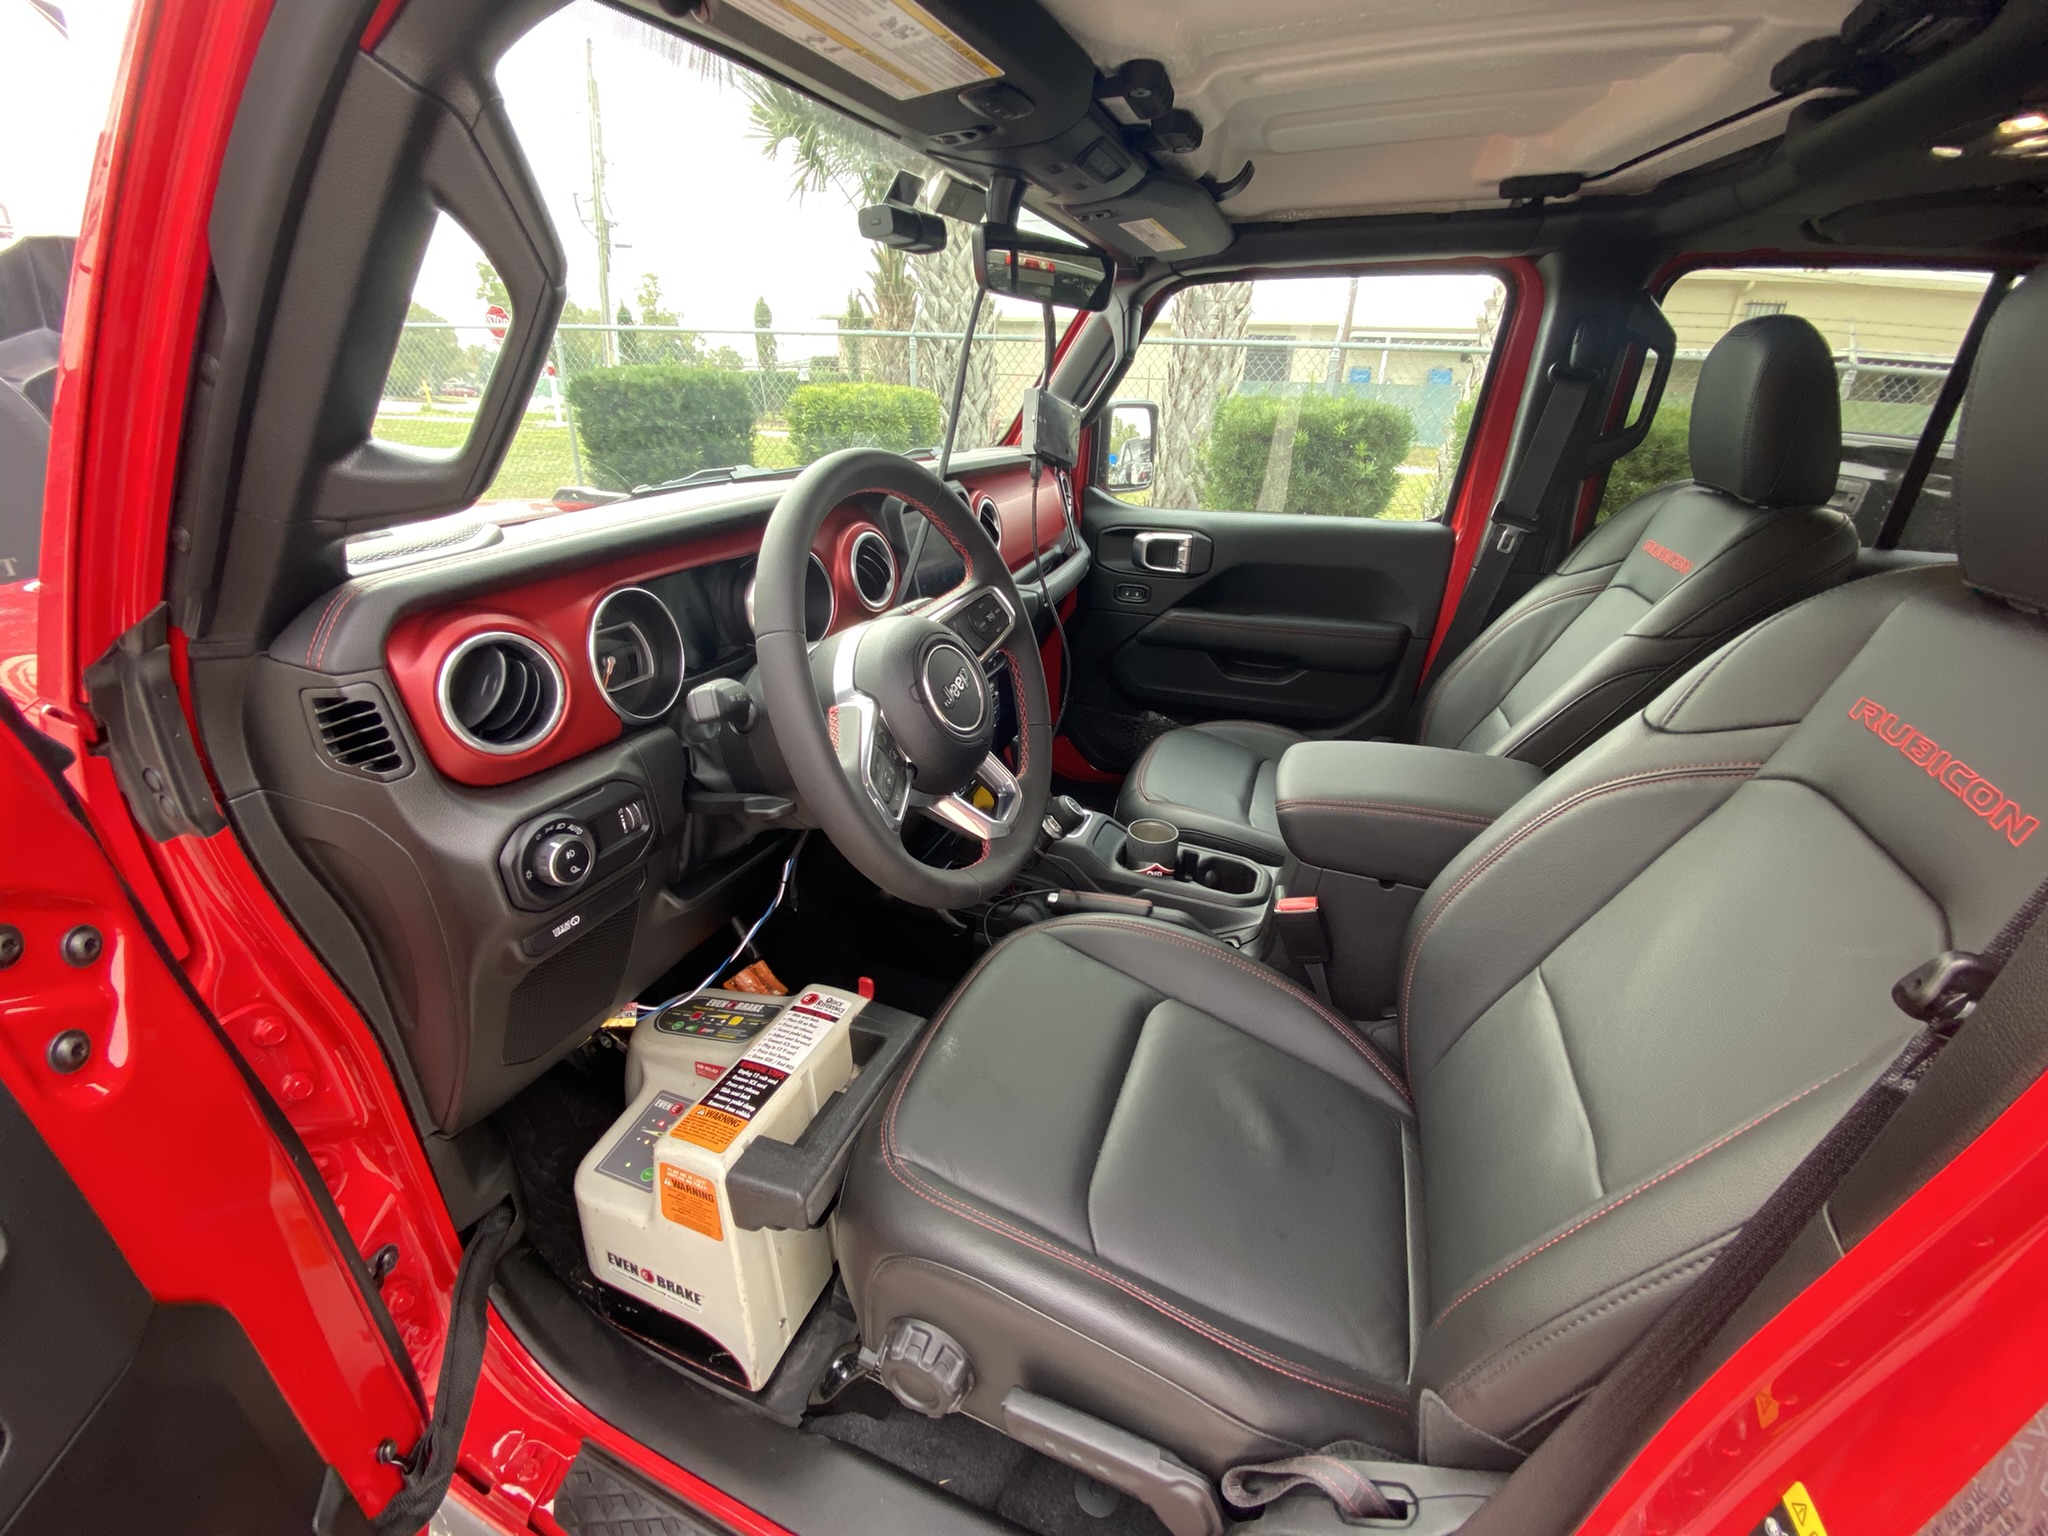
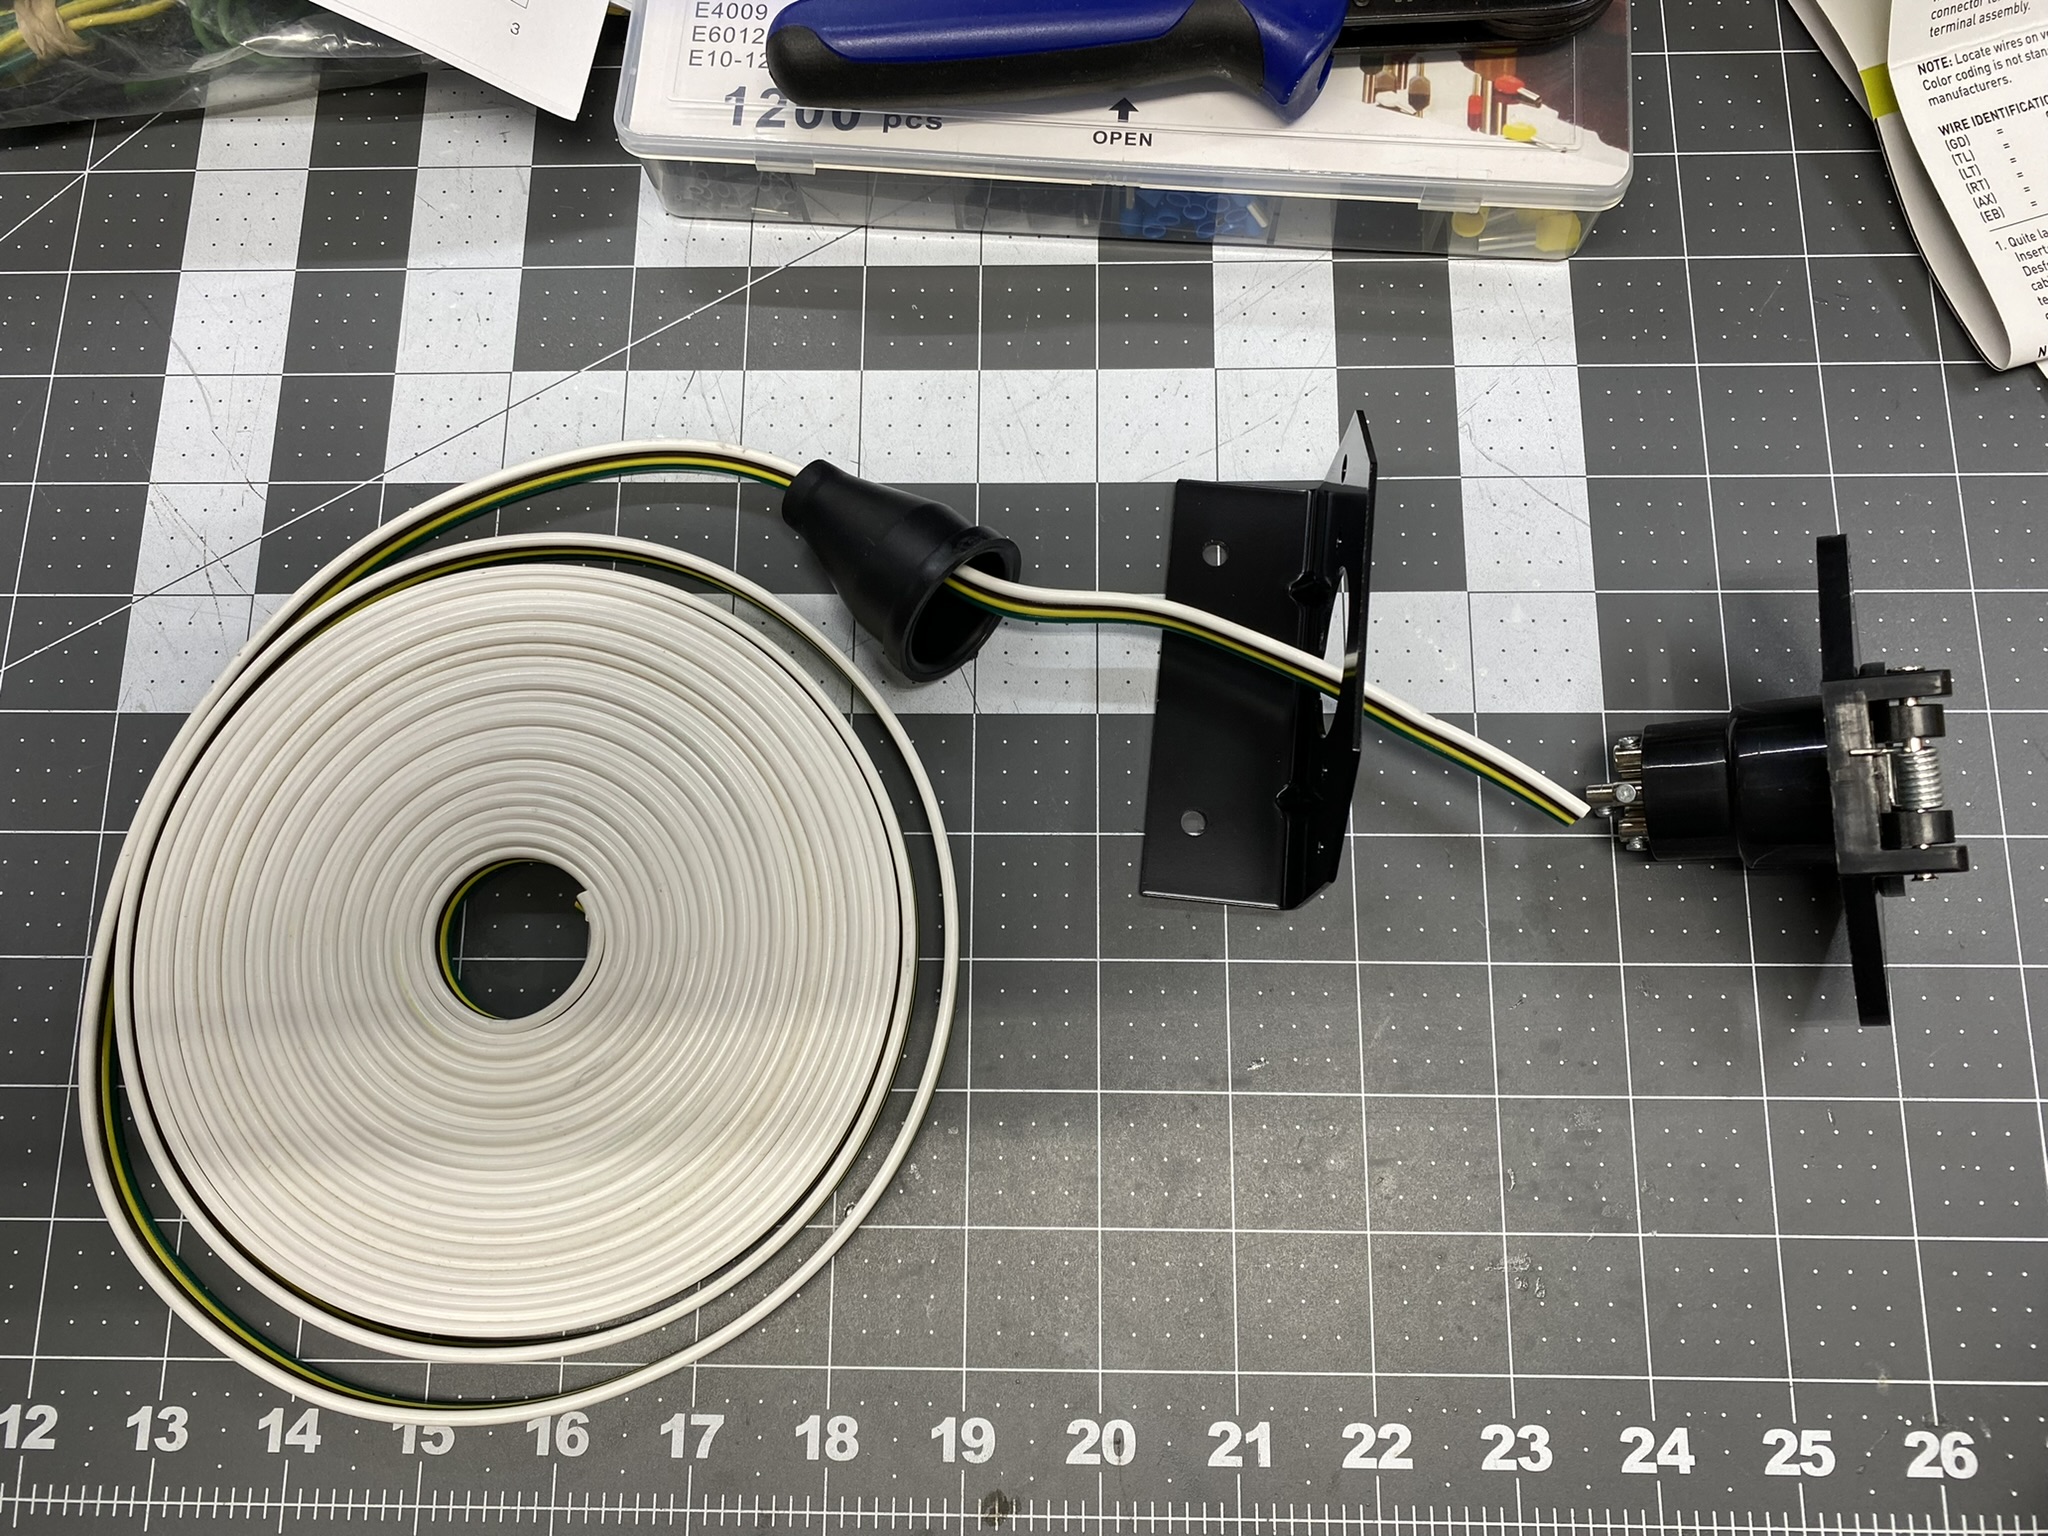 Most of the parts, ready to wire my Jeep. |
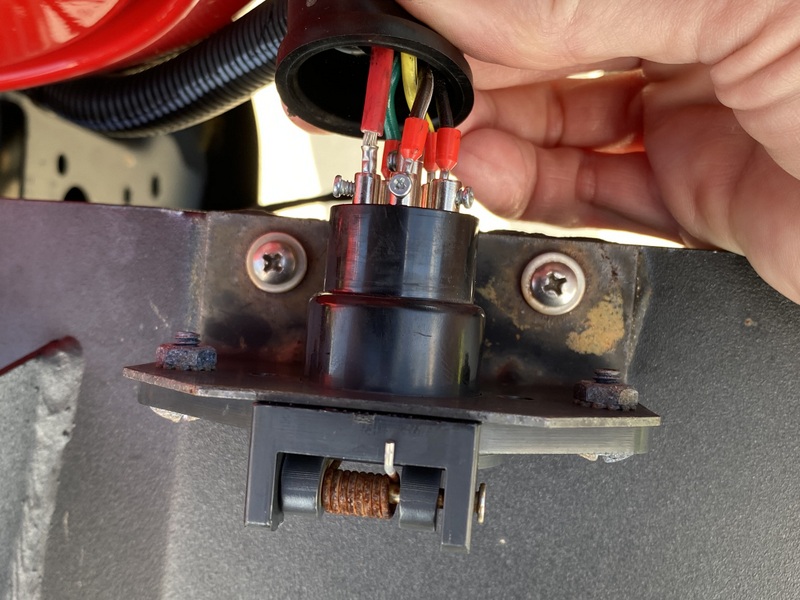
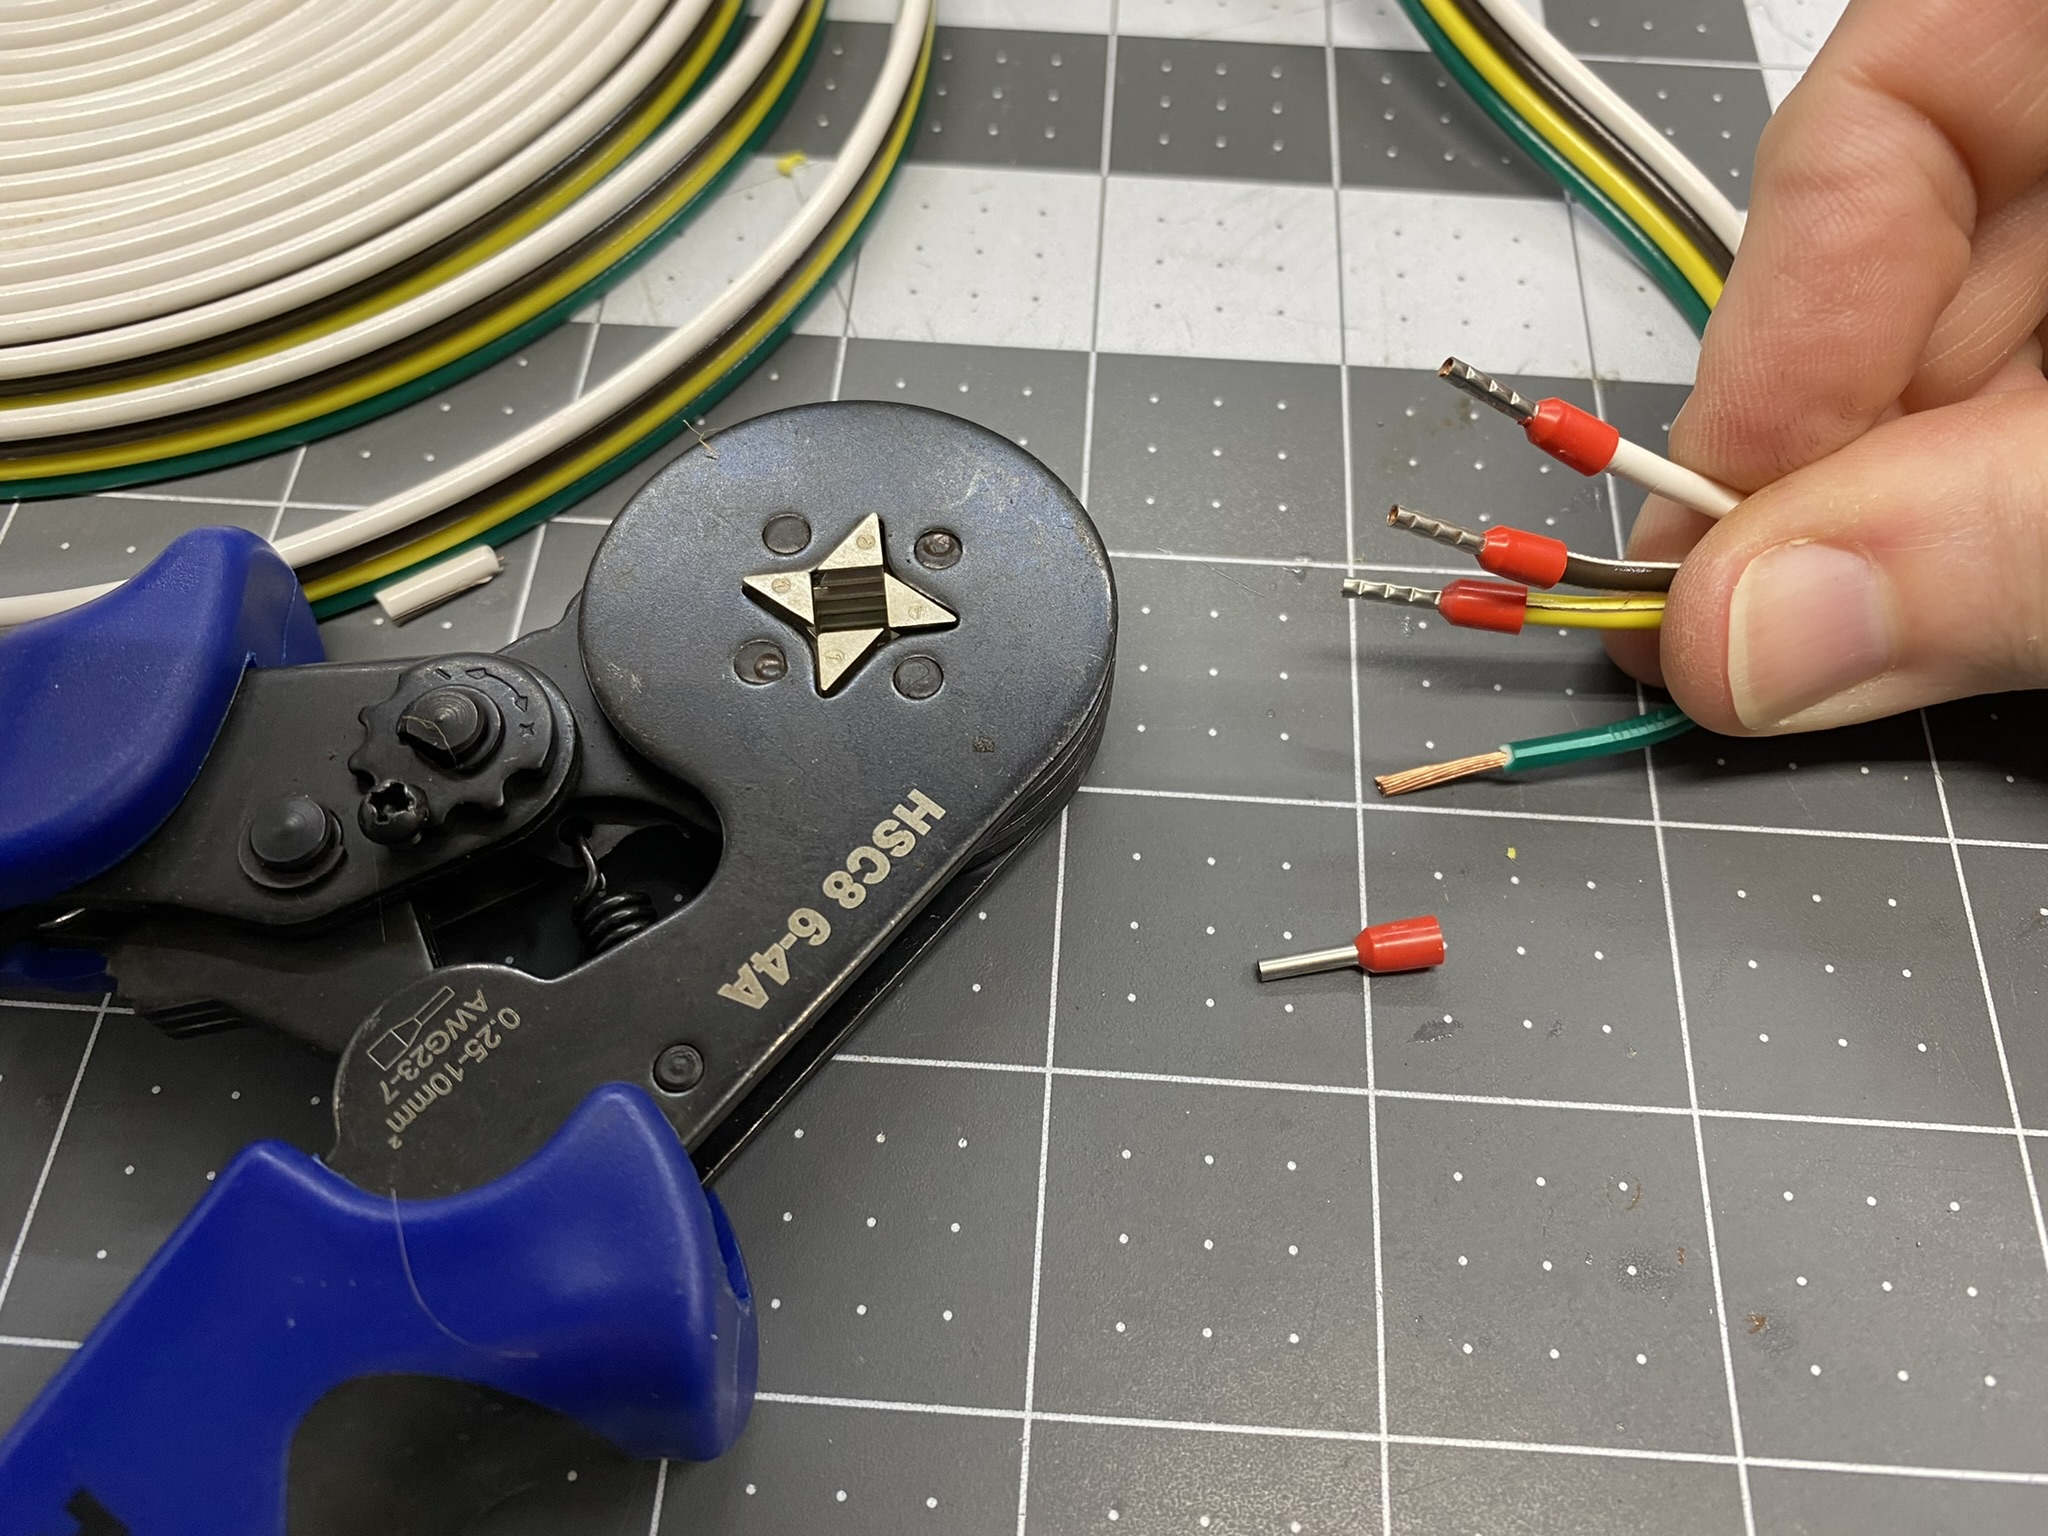 You can put the wires directly into the connector, and tighten the screws to pinch the wires. The downside is only a portion of the wires are being compressed. The rest of the wires will spread around the sides of the screw. By crimping on a ferrule, you'll maximize the electrical contact. |
 This is how I originally wired my connector. The fat red wire is the charging wire, to be connected to the Jeep's battery. But after hooking everything up, I noticed the battery wasn't charging. I didn't know about the two different wiring standards at the time. I simply moved the red wire to the unterminated connection, and everything worked as expected. |
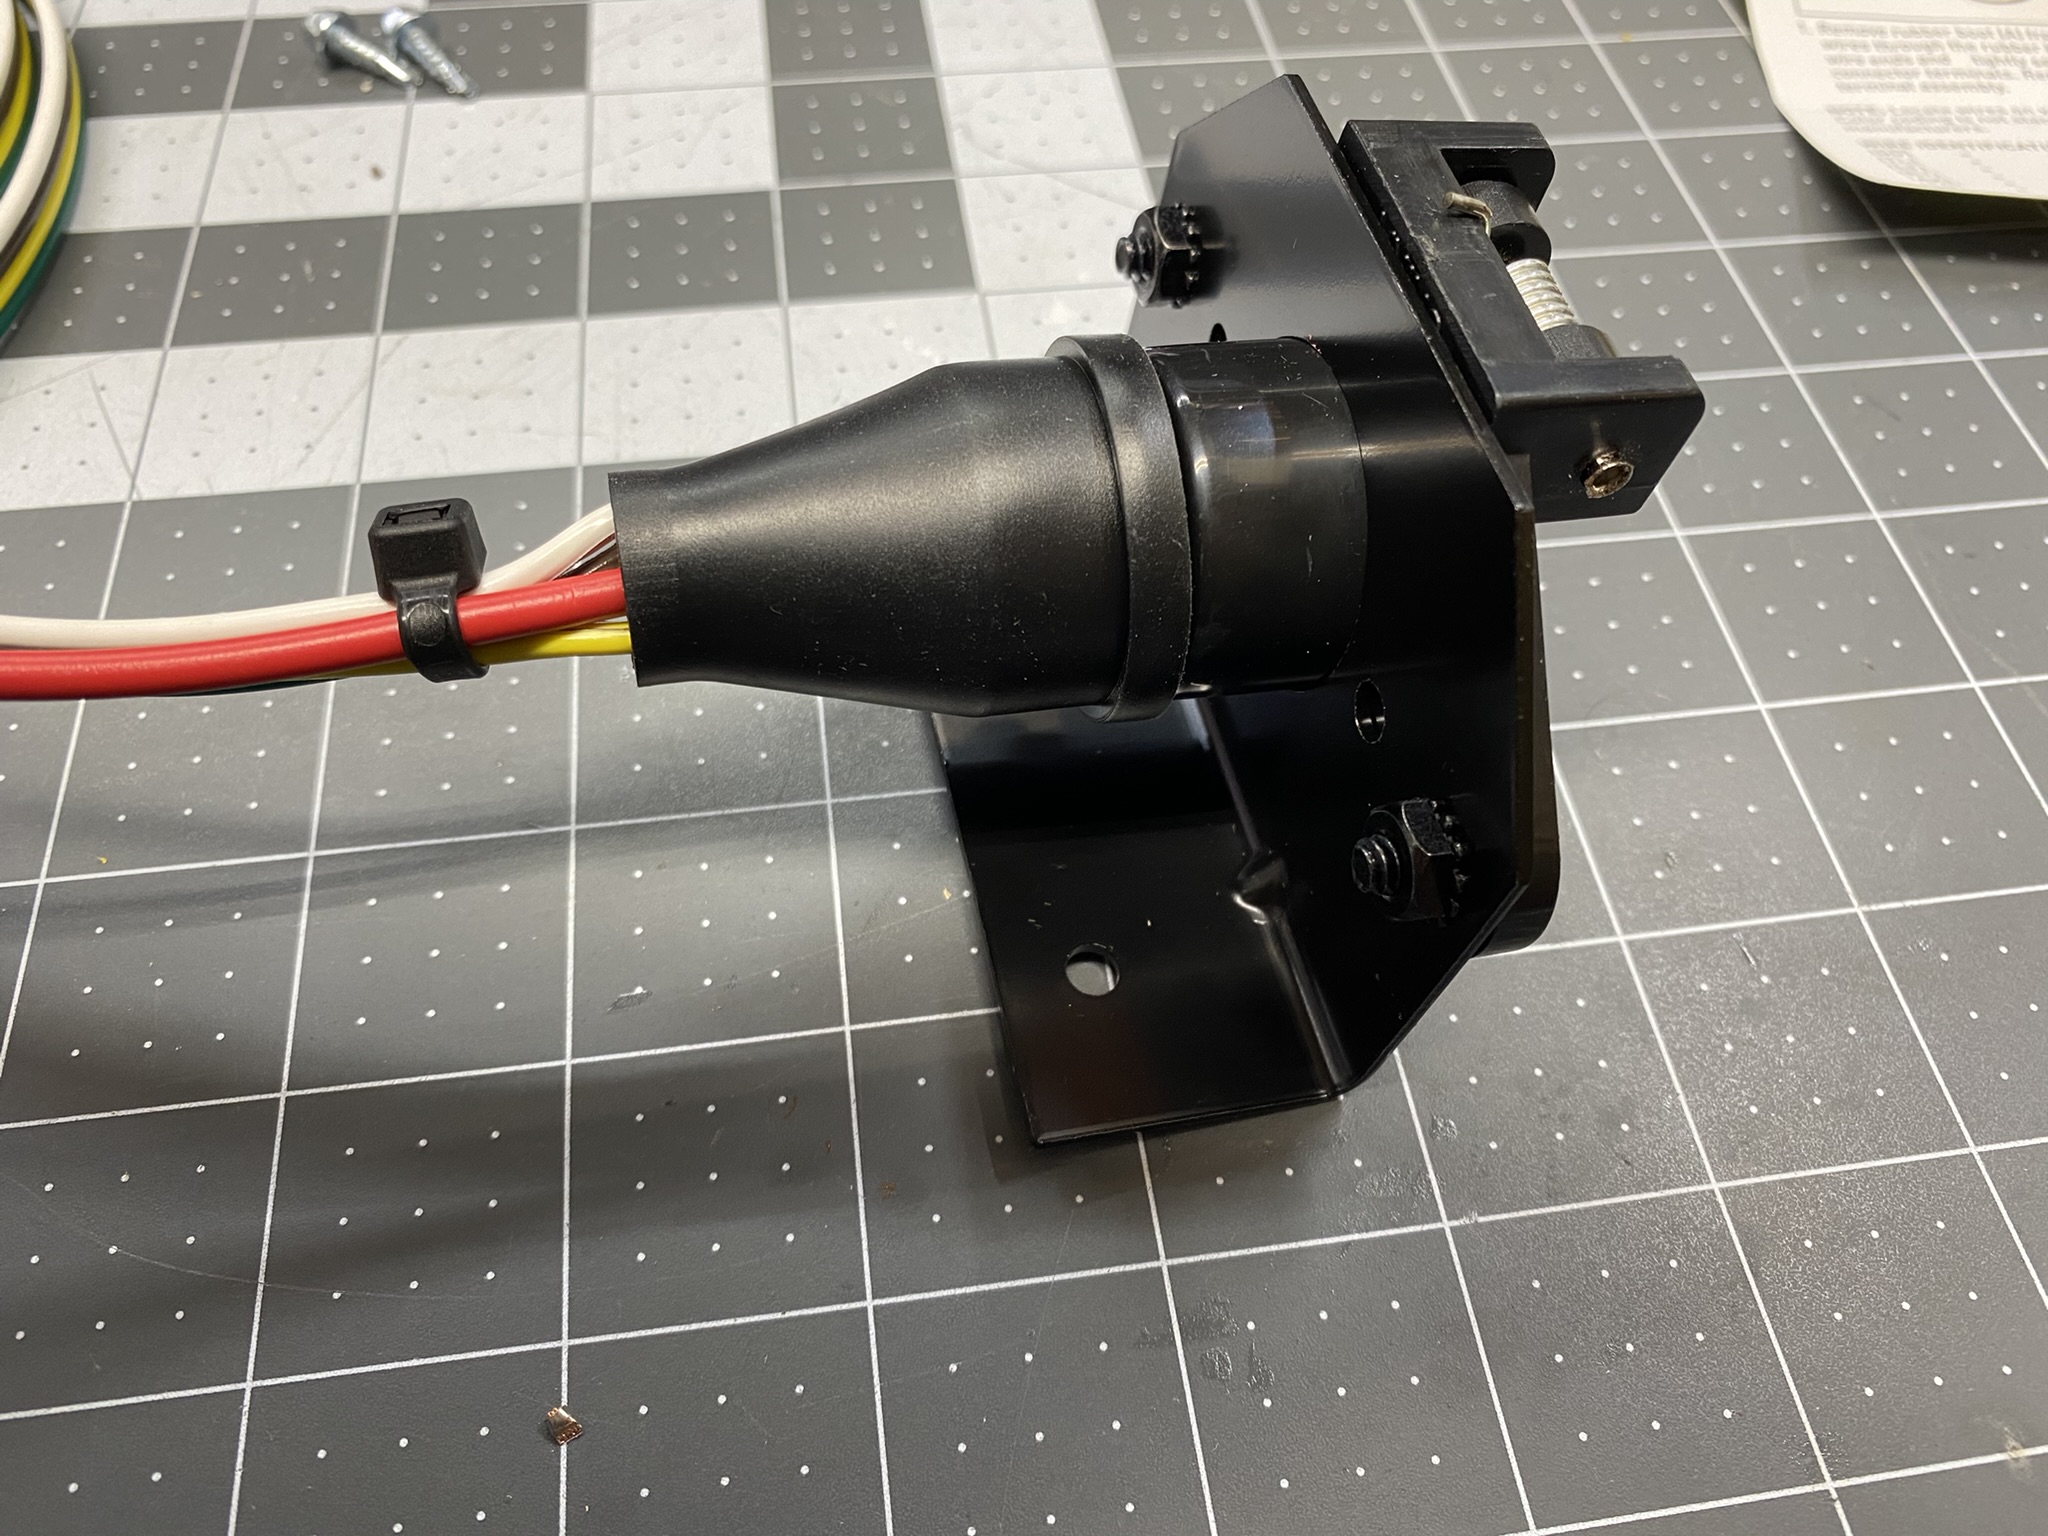 Ready to install on the Jeep. |
 The longer cable assembled, ready for use. |
 |
 Our first trip with the new setup, and I got the low voltage alarm. A quick check with a voltmeter, I found the 12V from the motorhome was on a different pin than I expected. It was a really easy fix at the campground. Pulled the boot back, backed off the set screw, and moved the wire to the other pin. The fat red wire is the aux 12V. |
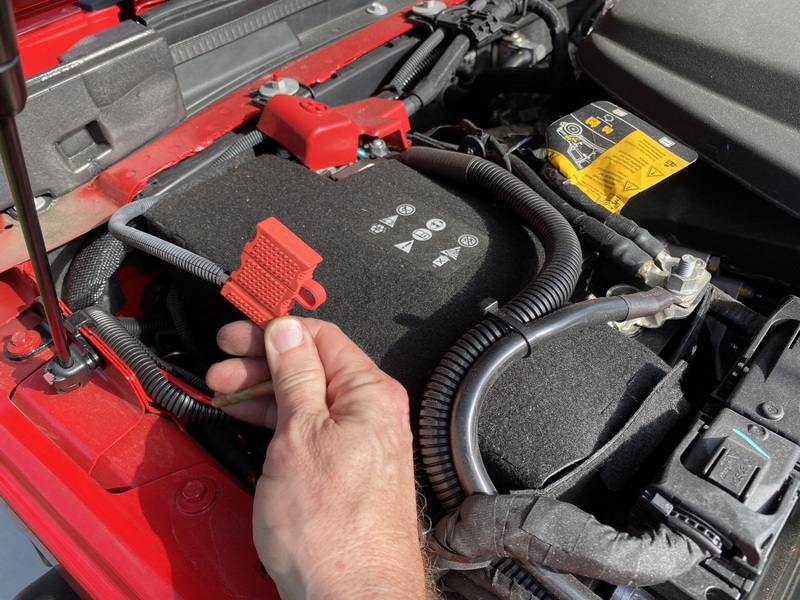 I put the red wire in split loom, and routed it to the battery, making sure to stay away from moving parts, and things that get hot. I added an inline fuse, close to the battery. I'm using a 15 Amp fuse. |
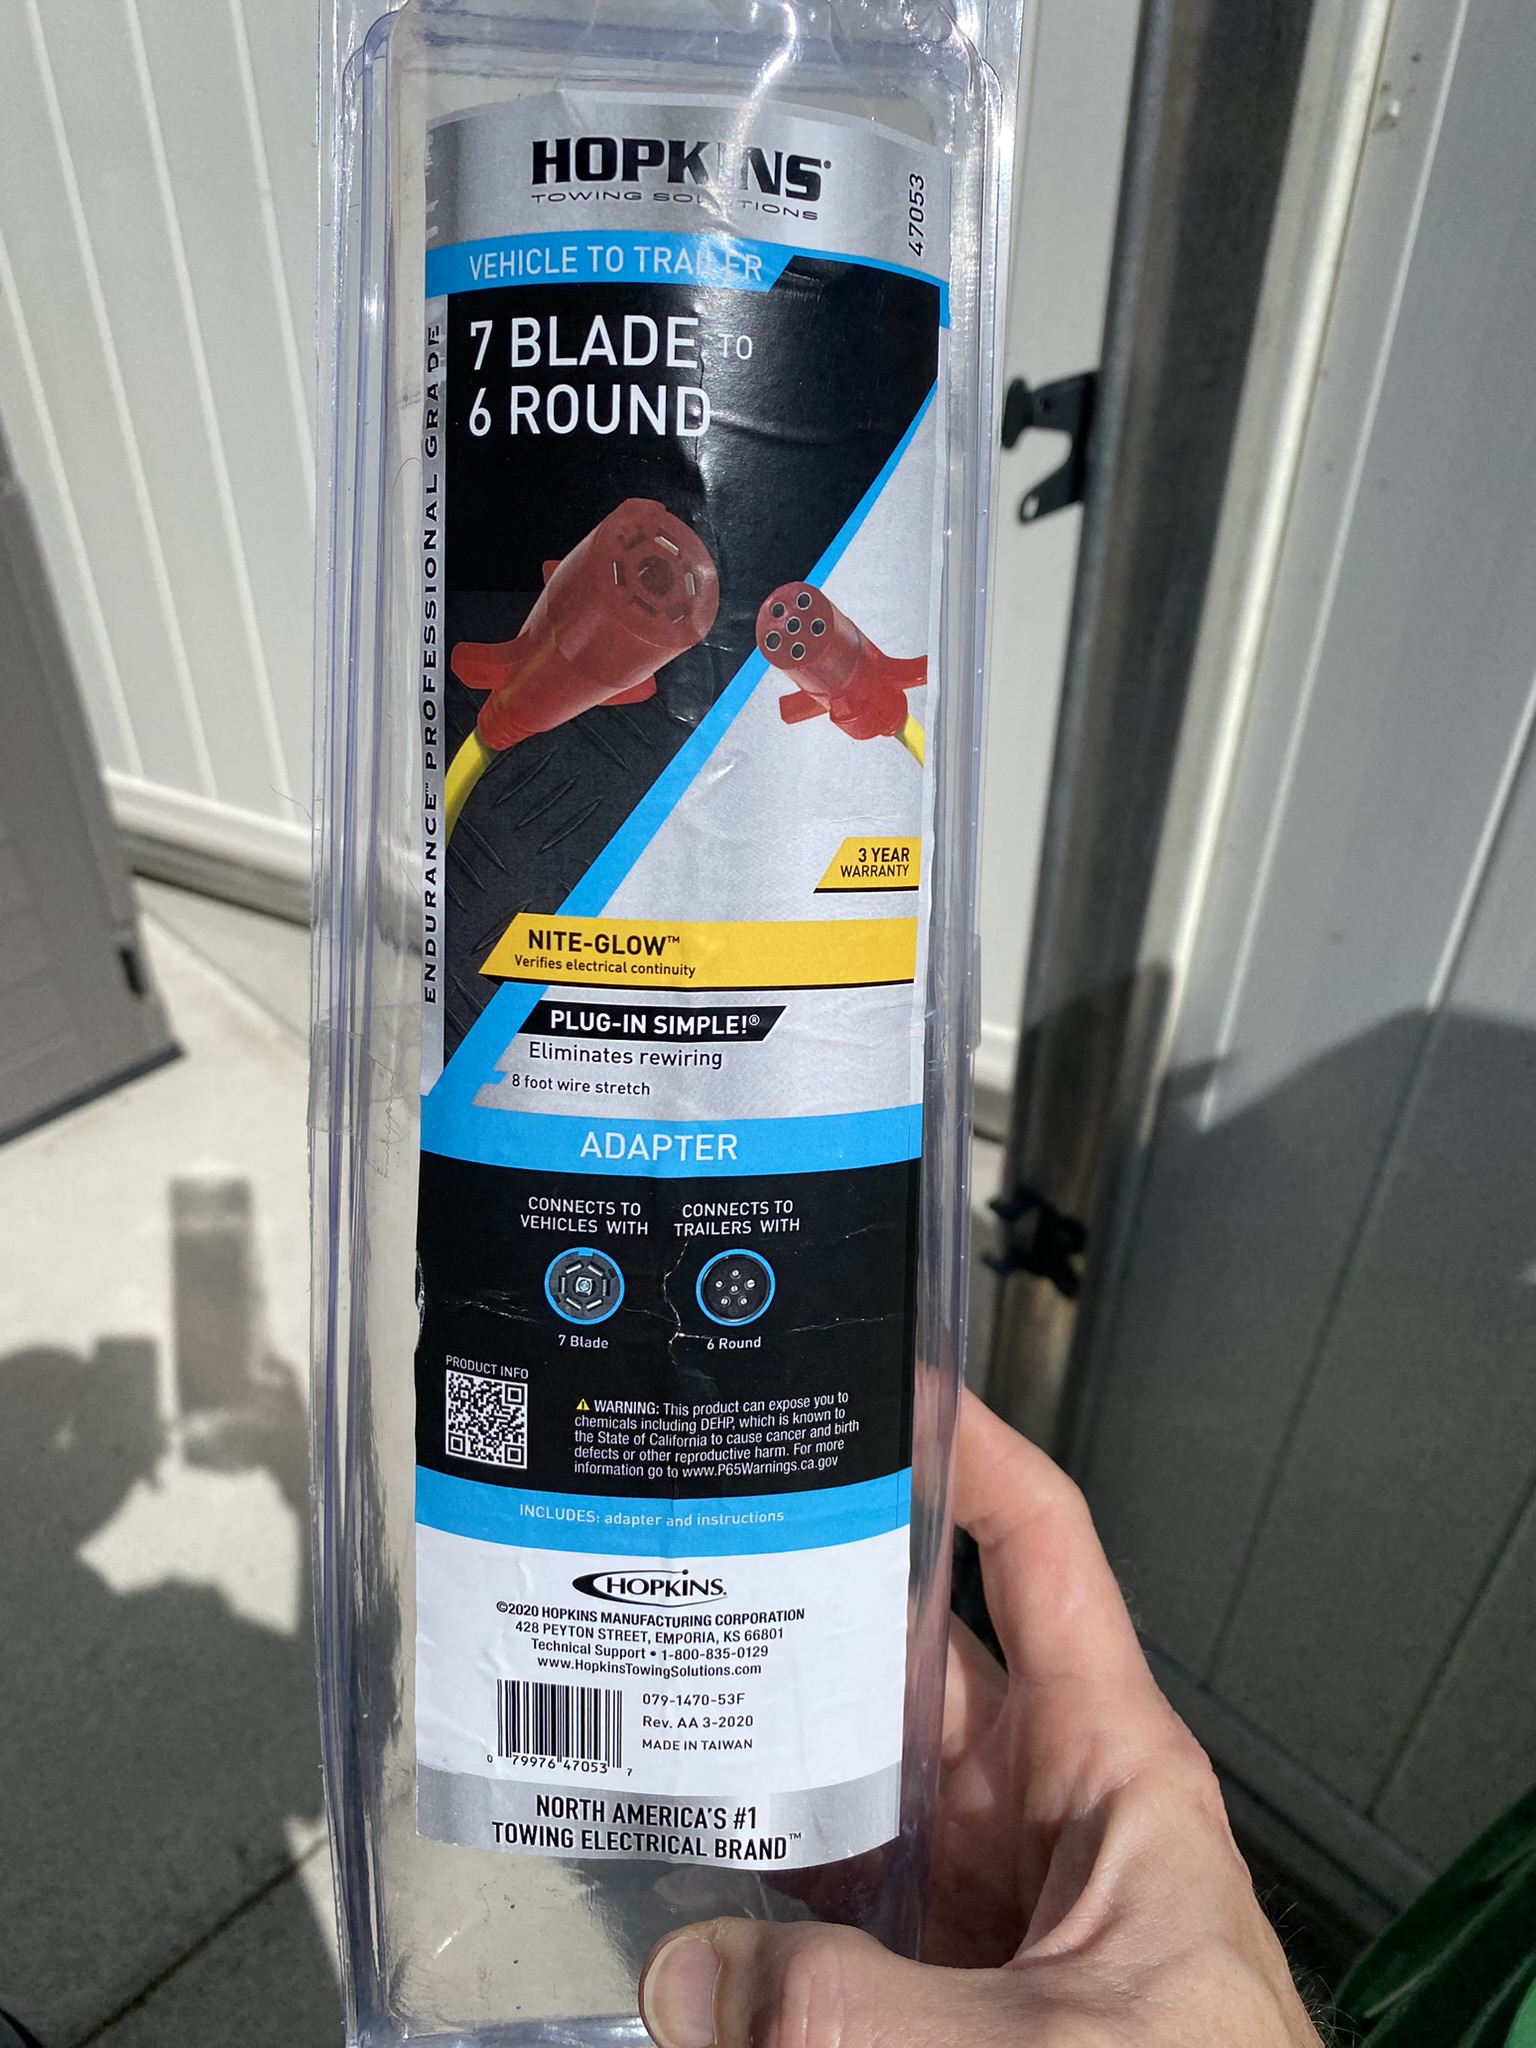
Recommended ProductsHopkins 48425 6
Pole Round Vehicle Connector
https://amzn.to/4abcyfi As an Amazon Associate I earn from qualifying purchases. Clicking the links cost you nothing extra, but does help support my website, thank you! |
|
|
Last updated 03/16/24 All rights reserved. |
